Leg Markers – Right(1) / Left(2)
Leg markers require two assemblies.

The images use marker “1” for explanation, but “2” follows the same procedure.
Fold the board
Fold Board A upward with the slit facing up.
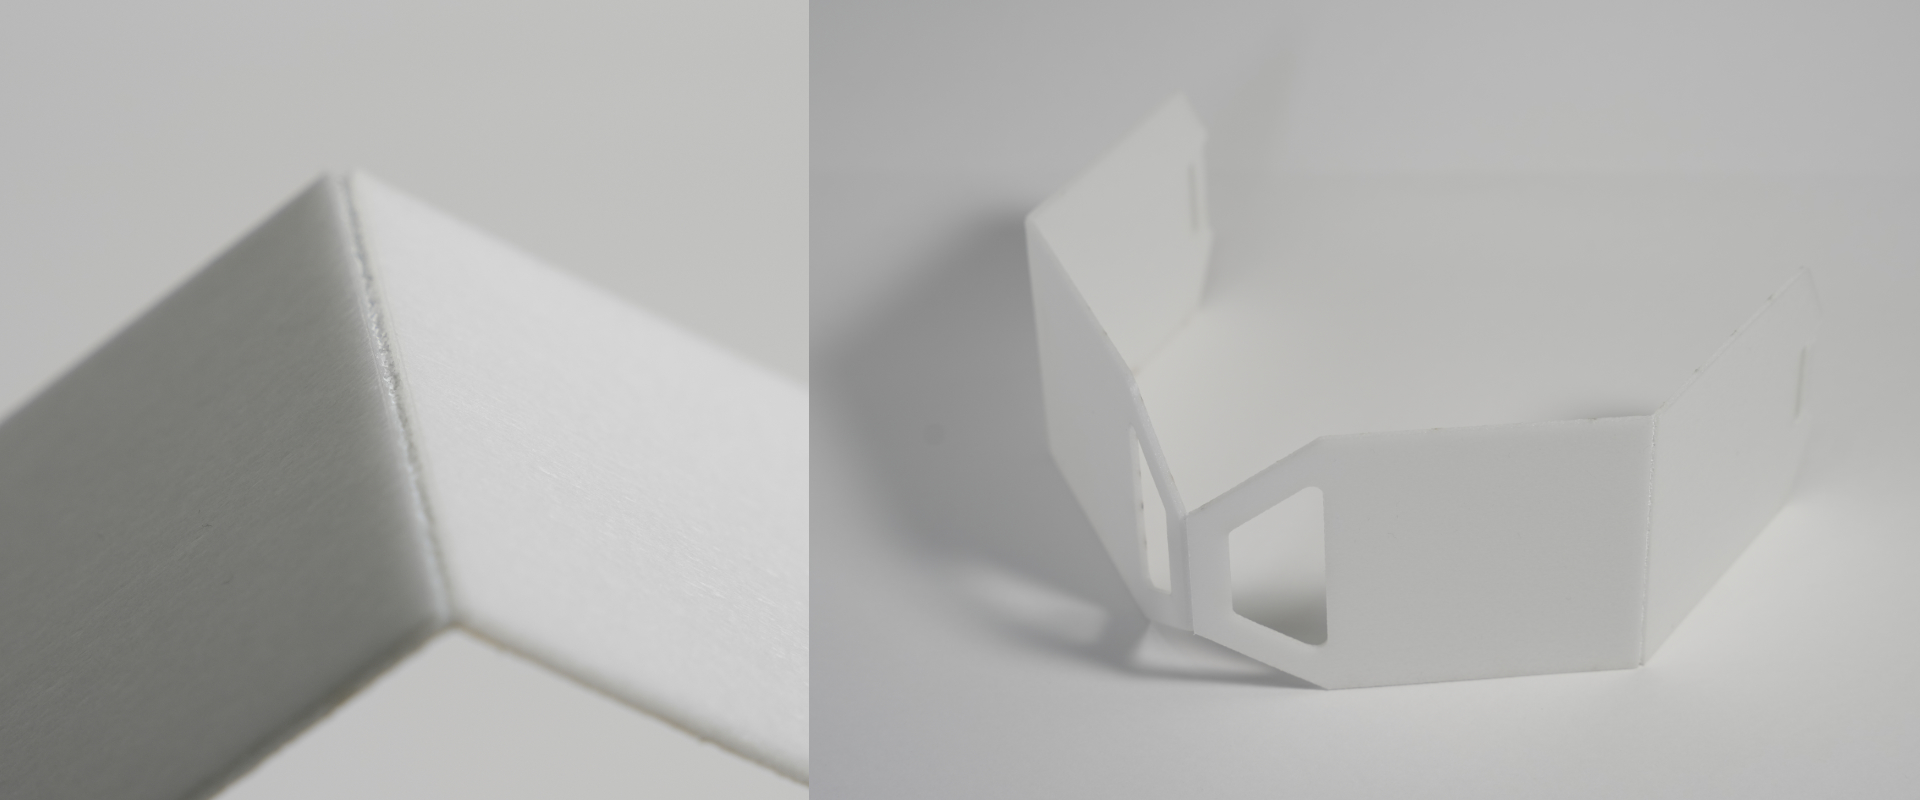
Do not bend with excessive force; keep the slit inside.
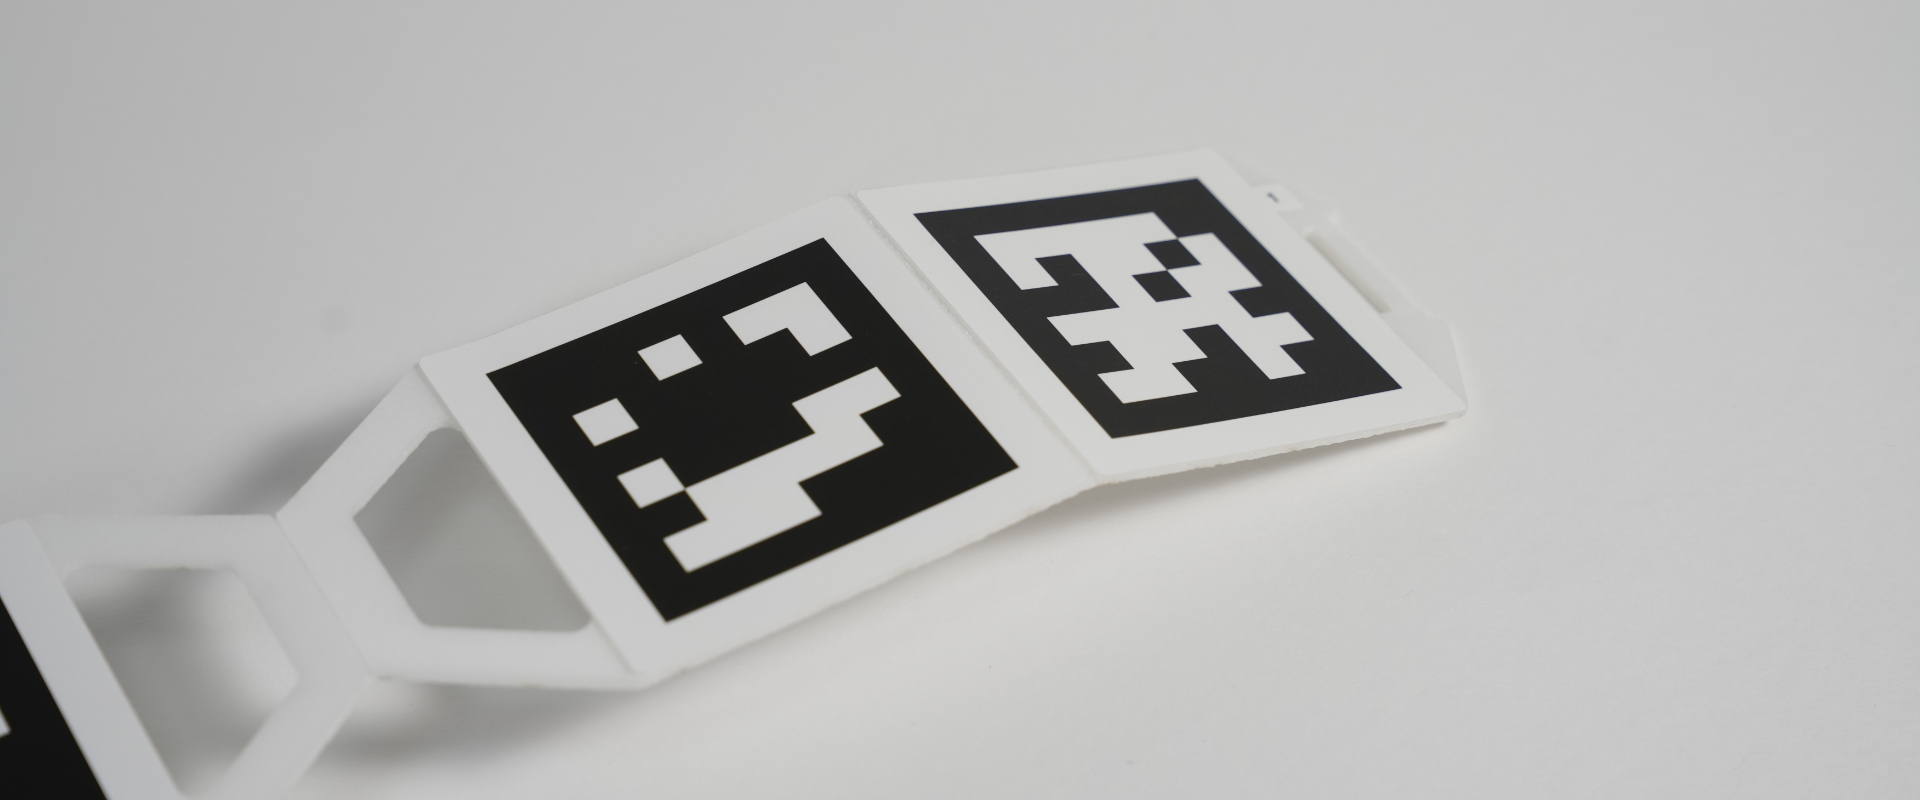
Apply the 2D marker sticker
Prepare sticker sheet 1 (blue).

Apply the stickers from left to right.
Fold the backing sheet as shown and lift the edge of the sticker.

Align the sticker edge with the board’s cut line.
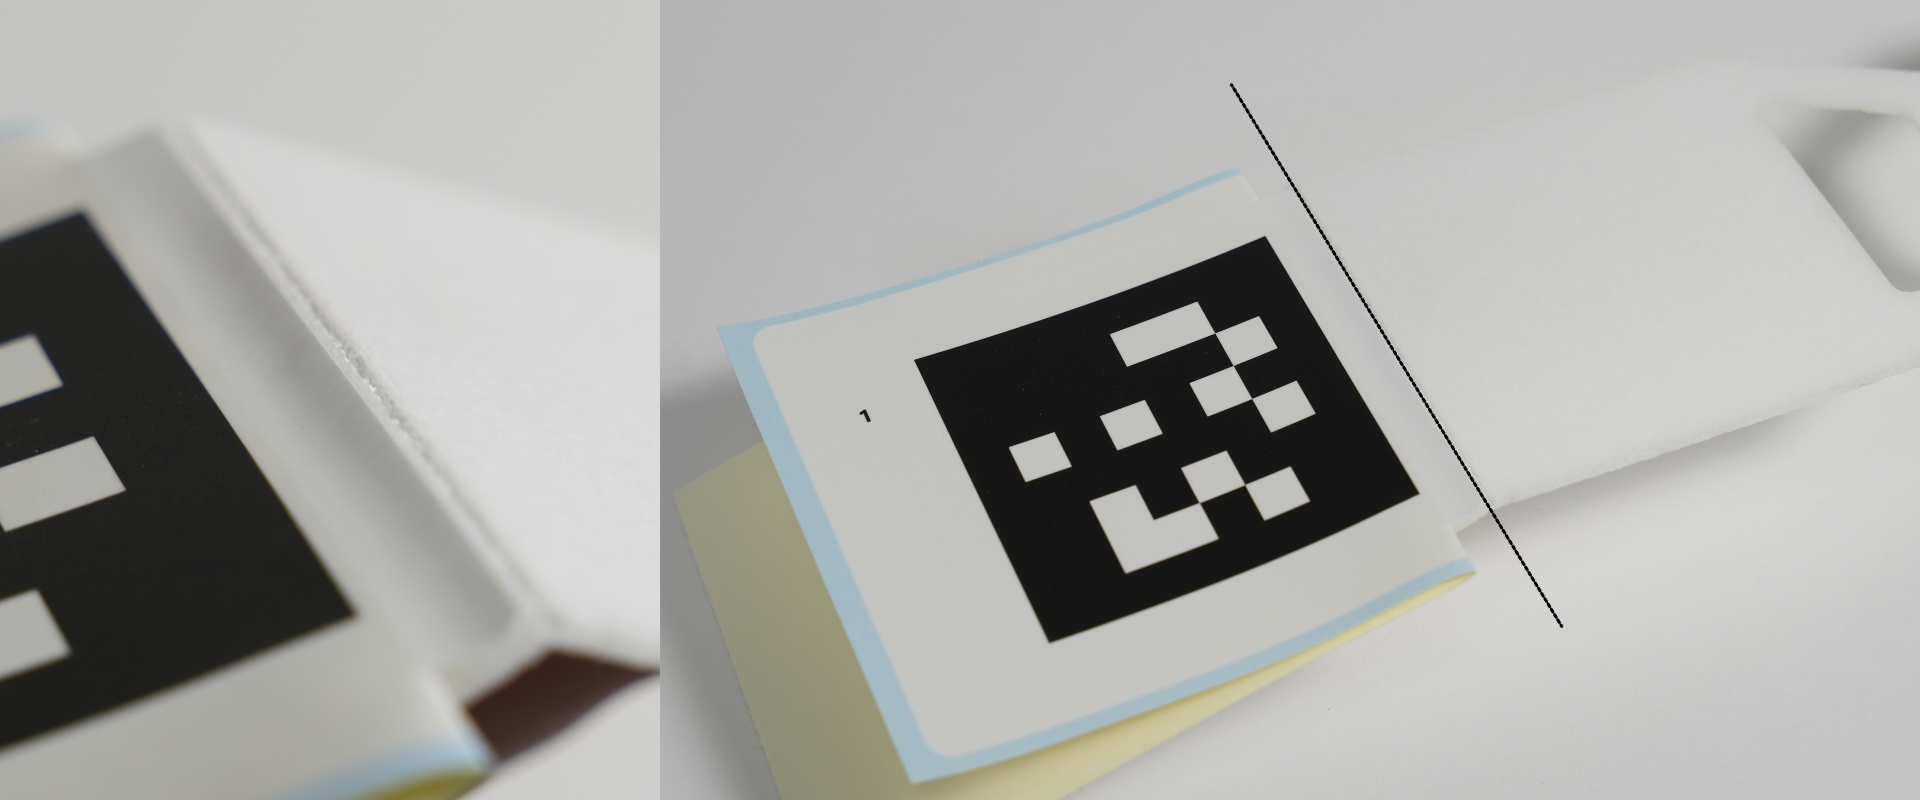
Align the edge of the sticker with the cut line on the board.
Peel the sheet slowly to attach the sticker completely.
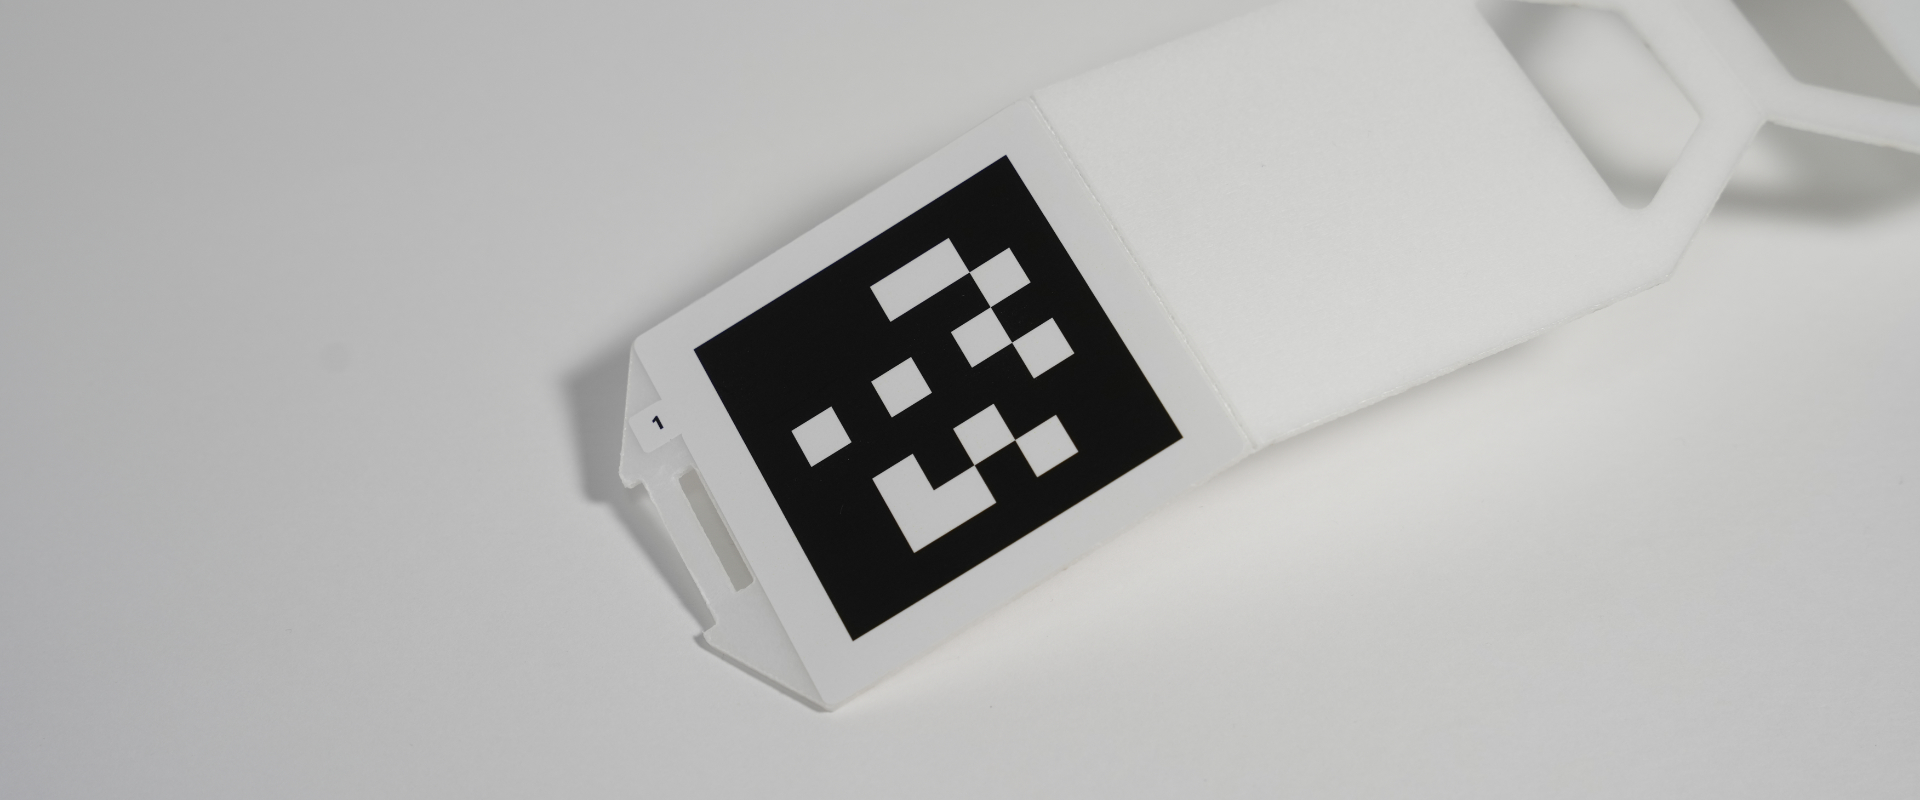
Next, apply the adjacent sticker.
Fold the backing sheet as shown and lift the edge of the sticker.

Align the sticker edge with the board’s cut line.

Peel the sheet slowly to attach the sticker completely.
Repeat the same steps for the other two.
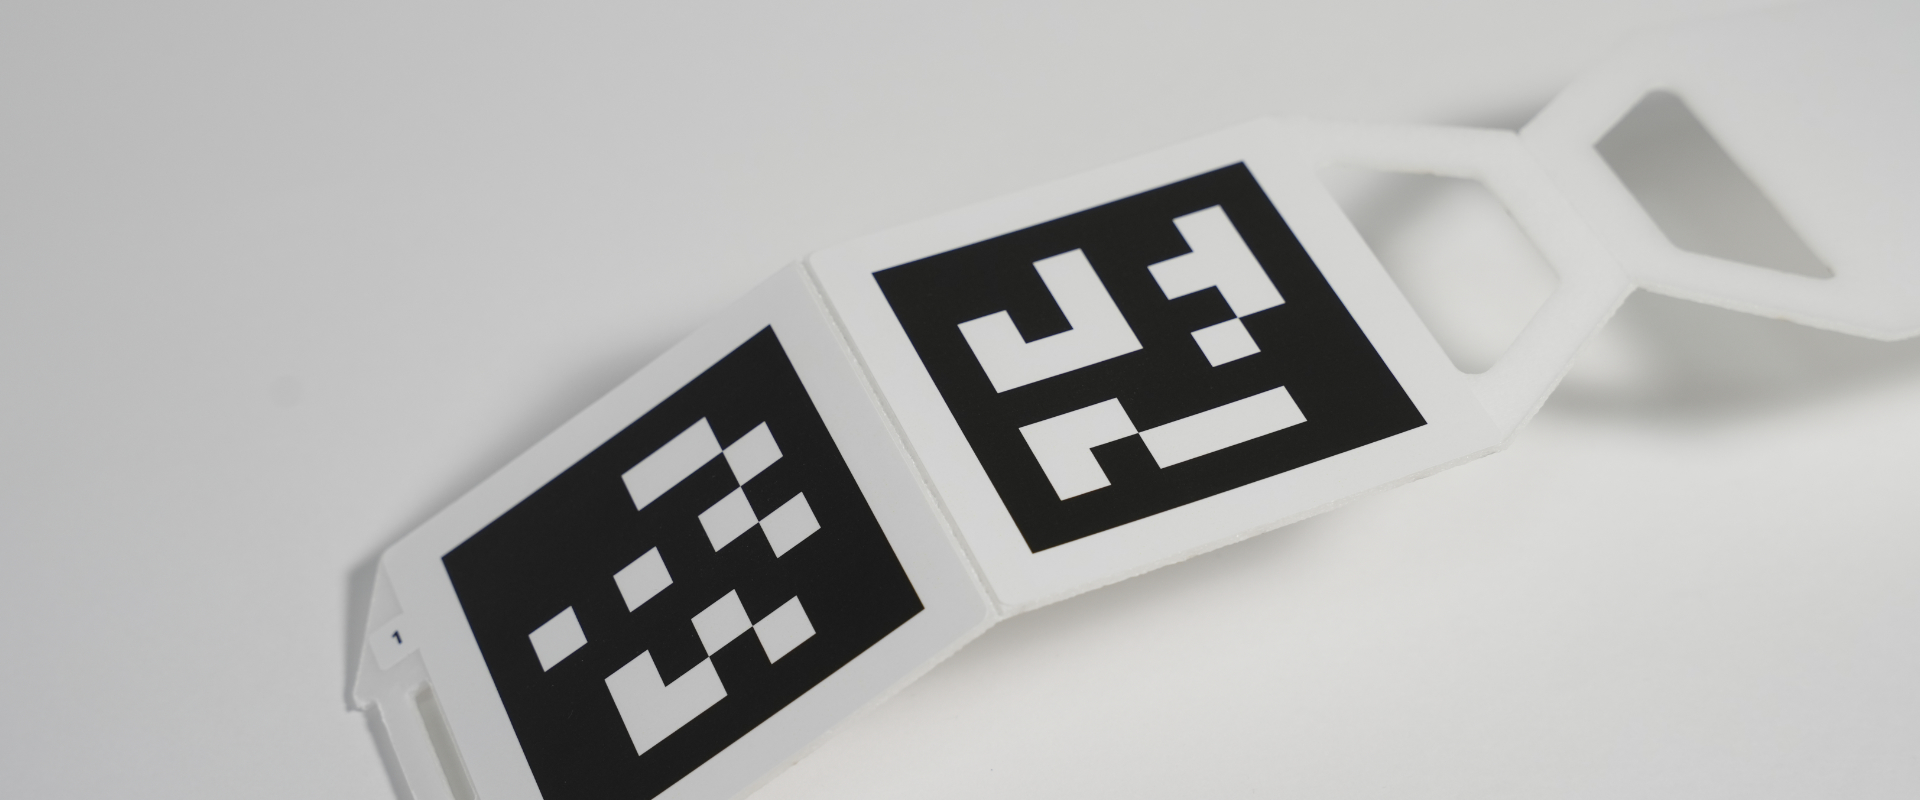
Assemble it with the holder
When using the marker, wrap the belt around your body and insert the 2D-marker board into the holder’s slot.
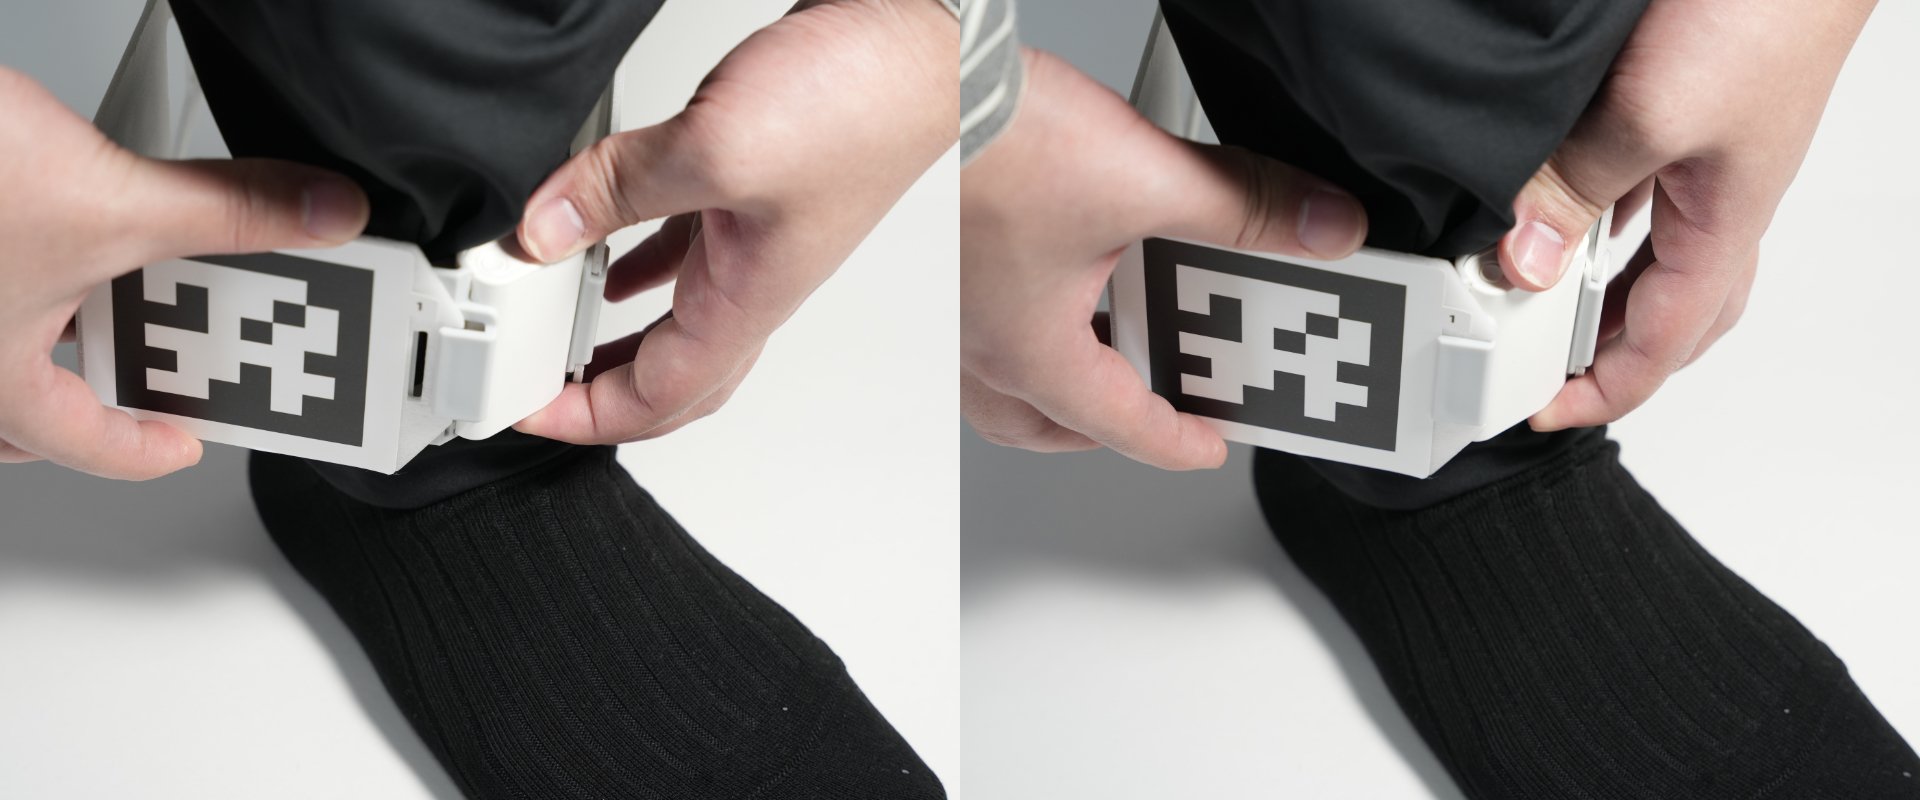
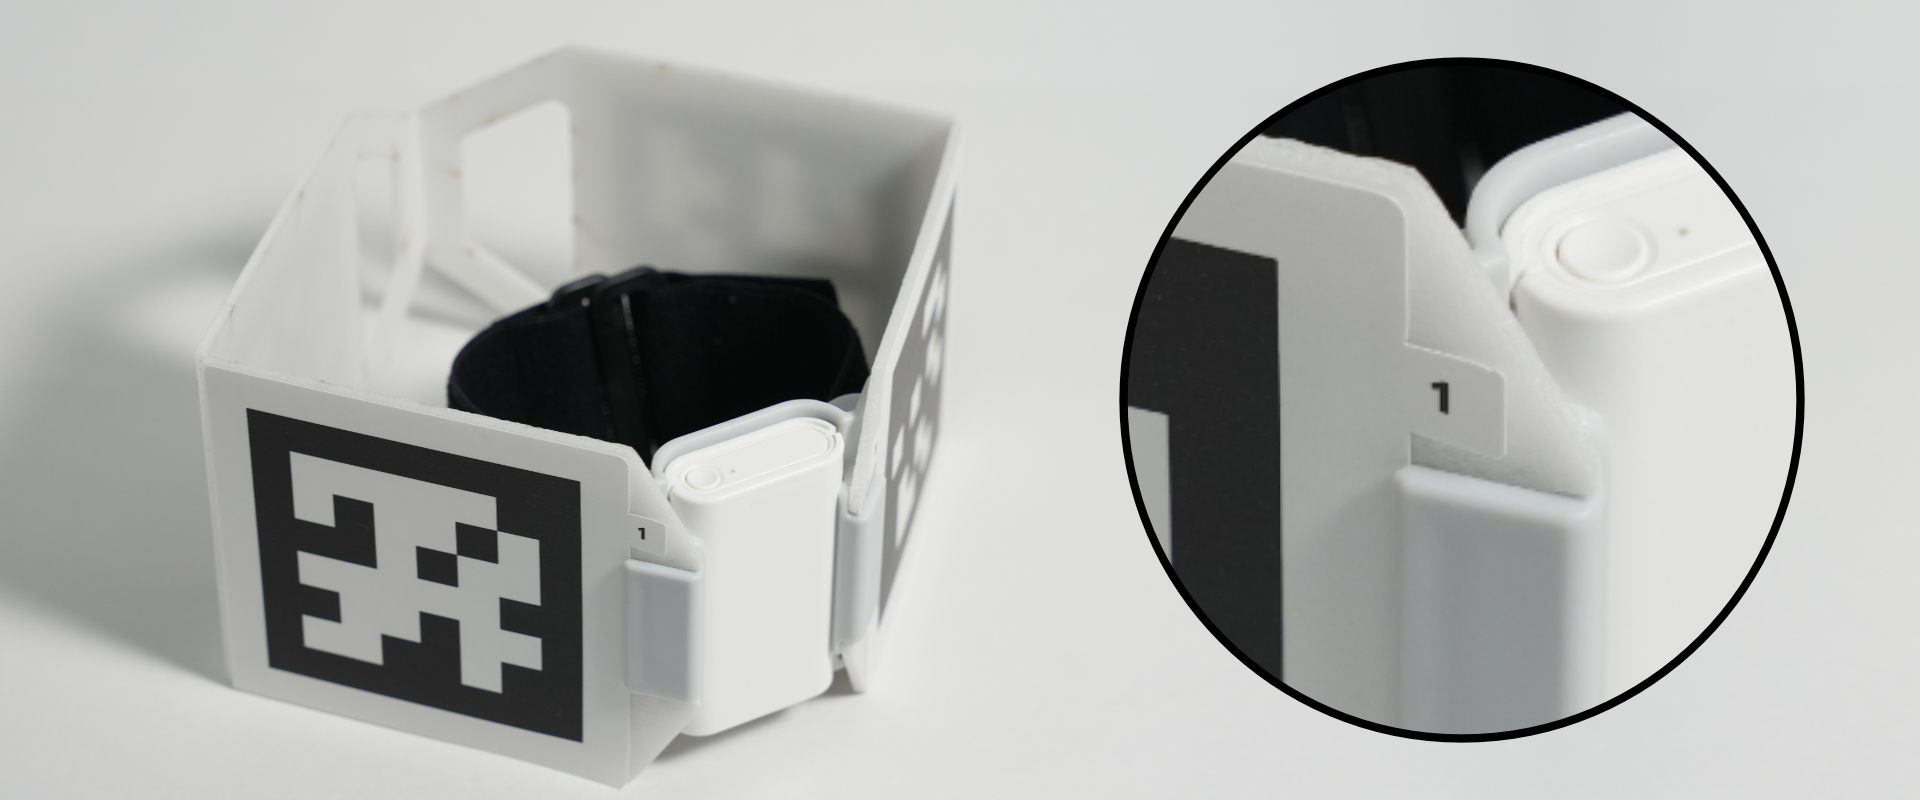
The number printed on the marker should face upward.